OSC is a wonderful tool. It is a universal language which the majority of entertainment software and tools support.
At its heart OSC is just sending a written message to the address you tell it to, like sending a letter or an email (depending on your age and points of reference).
The most common use is triggering cues on other devices, which we will focus on here. In this example we will use QLab to send a message to ETC EOS lighting consoles.
QLab actually has premade libraries for a huge range of devices to make your life easier, but I will look at triggering EOS from QLab here.
Step 1: Connect the devices together
Using an Ethernet cable, connect the QLab device to the lighting console/laptop. This can either be via a switch, router or a direct connection.
In this example we will assume the following addresses:
- Router: 192.168.0.1
- Mac: 192.168.0.2
- Lighting Desk: 192.168.0.3
- Subnet for all: 255.255.255.0
Through a router or switch
Direct connection
Step 2: Address the Mac
- On the Mac, open System Settings > Network and select your Ethernet adaptor > Details.
- Disable Private Wi-Fi address (set it to Off).
- Disable Limit IP address tracking.
- Then click TCP/IP in the sidebar.
- Next to Configure IPv4 change the drop-down to Manually.
- Then fill in the address and subnet.
- If it asks for a DNS server, use 8.8.8.8 and 8.8.4.4
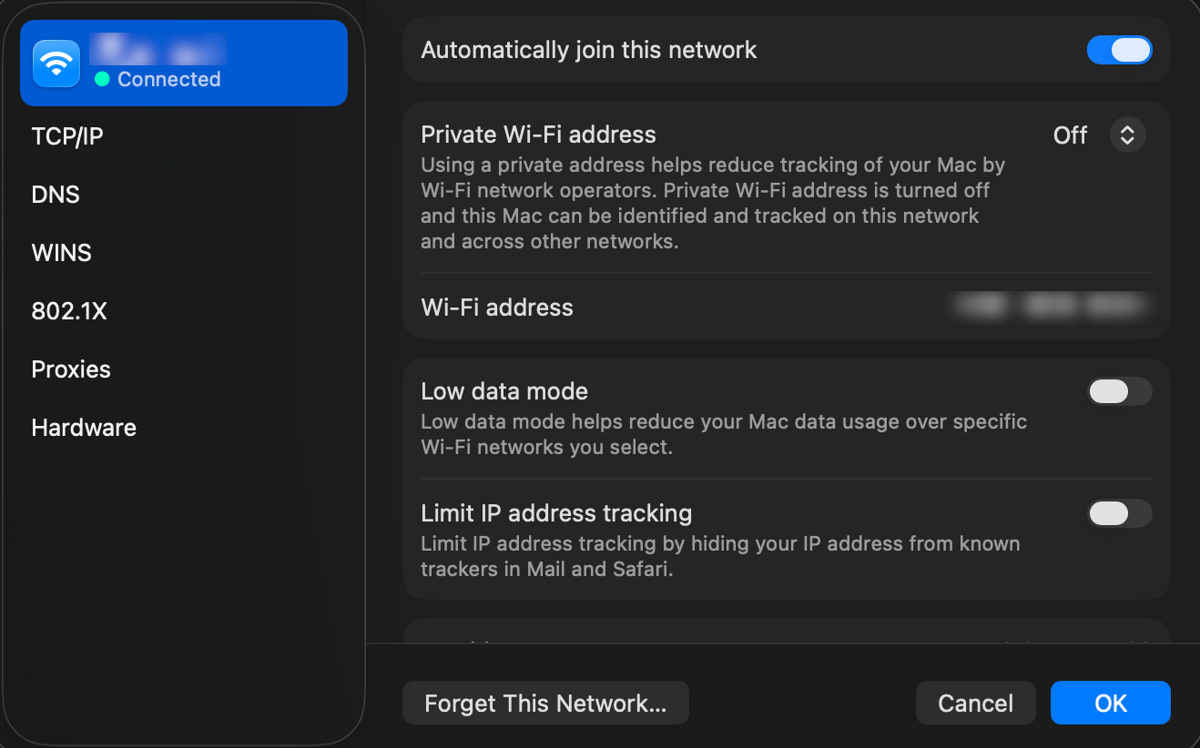
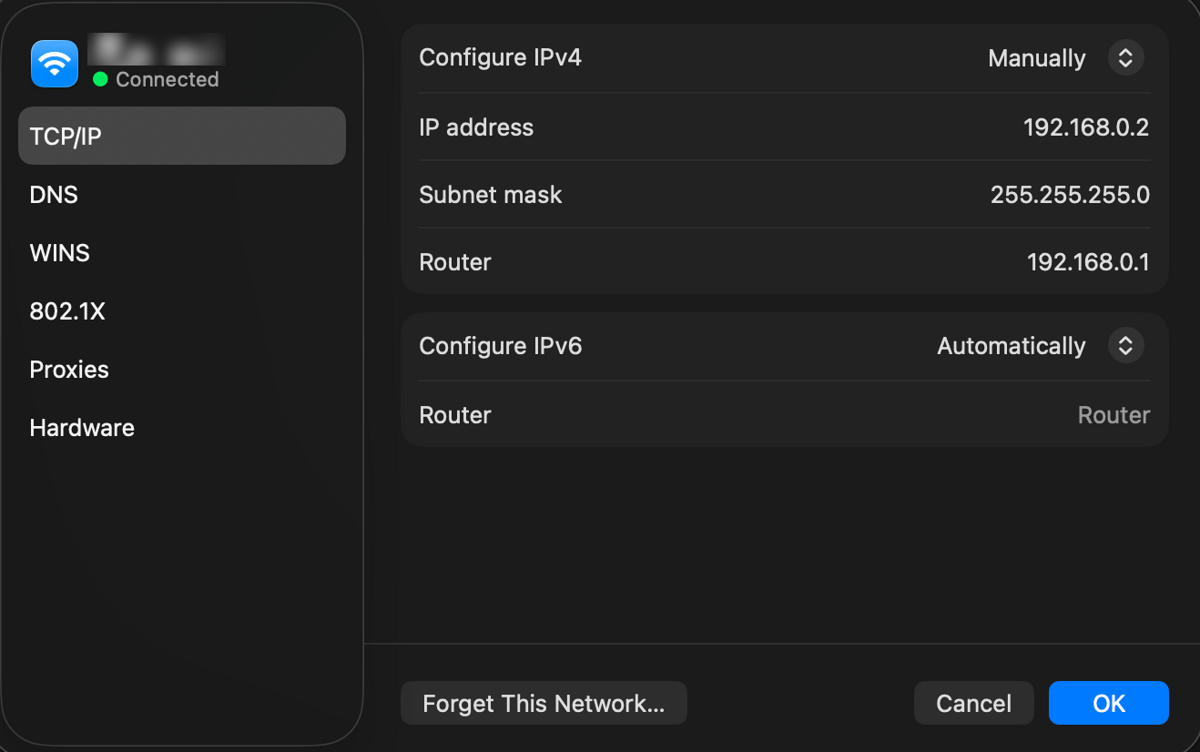
If connecting directly or with an unmanaged switch it does not matter that you are not addressing or using a router - by addressing the devices like this they can still talk to each other.
Step 3: Address the Lighting Console
For an EOS console running version 3.x.x:
If connecting to an EOS Nomad on a laptop you will need to change the network settings in the laptop settings.
- Open the CIA (pop up at the bottom with File actions).
- Go to setup, then Device, Network, and enter the Address and subnet here.
- Make sure all OSC options are enabled.
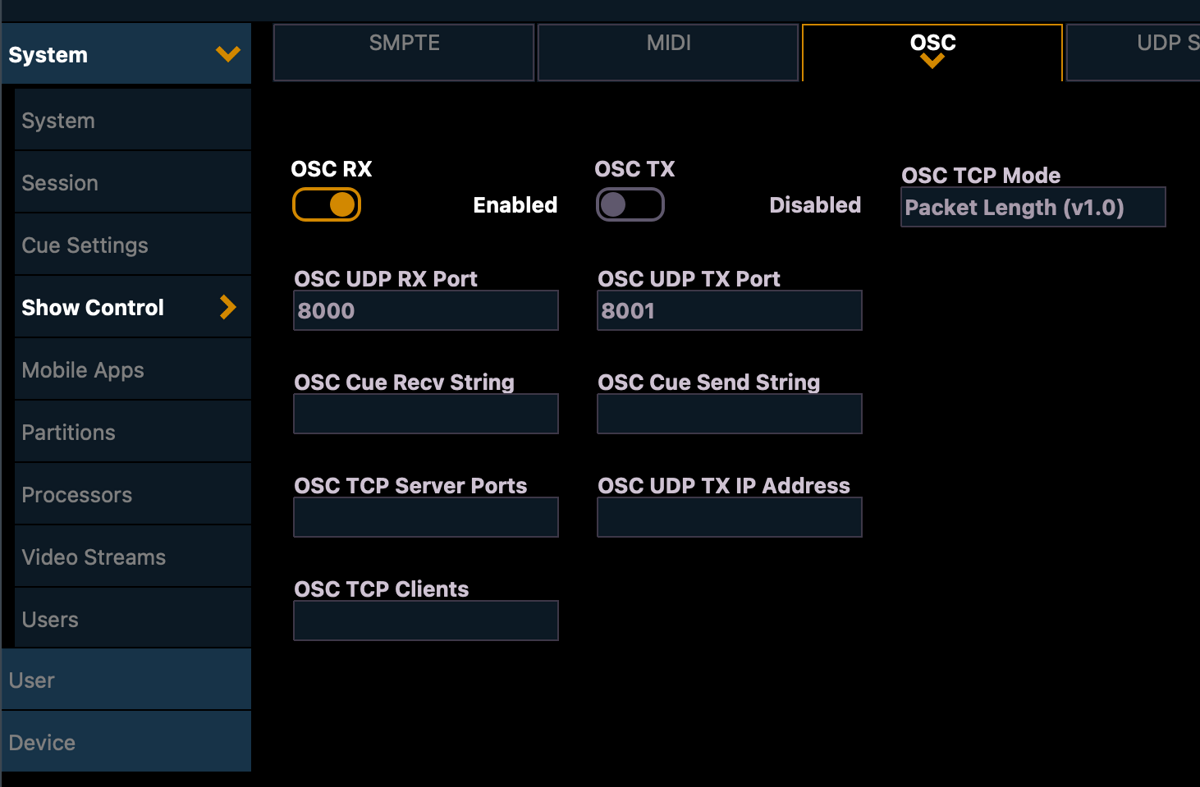
- Then go to System, Show Control, OSC and ensure OSC RX (receiving) is enabled.
- Make sure the port is configured to 8000. This can be anything but must match what we enter into QLab later.
Step 4: QLab Settings
- Open your QLab workspace.
- Open the settings.
- Go to Network.
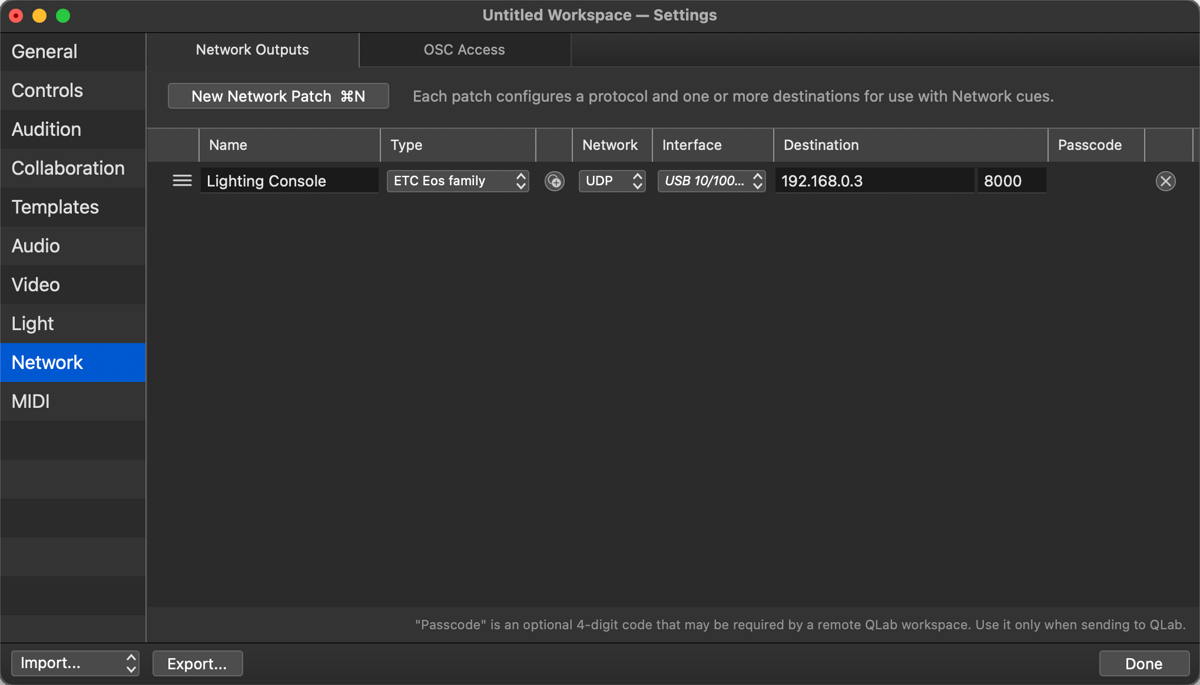
- Create a new Network patch.
- Name this something like Lighting Console. Set Type to ETC EOS Family.
- Set Network to UDP.
- Select the Ethernet Device under Interface.
- Set the address you used for the desk (192.168.0.3) and make sure the port next to it matches what we set as the OSC port on the desk.
- Go back to your workspace.
- Create a network cue.
- Under the cue Settings:
- Select the Lighting Console patch
- Type - Cues
- Specify user - No
- Command - Run Cue
- Cue - Enter the cue number you wish to fire.
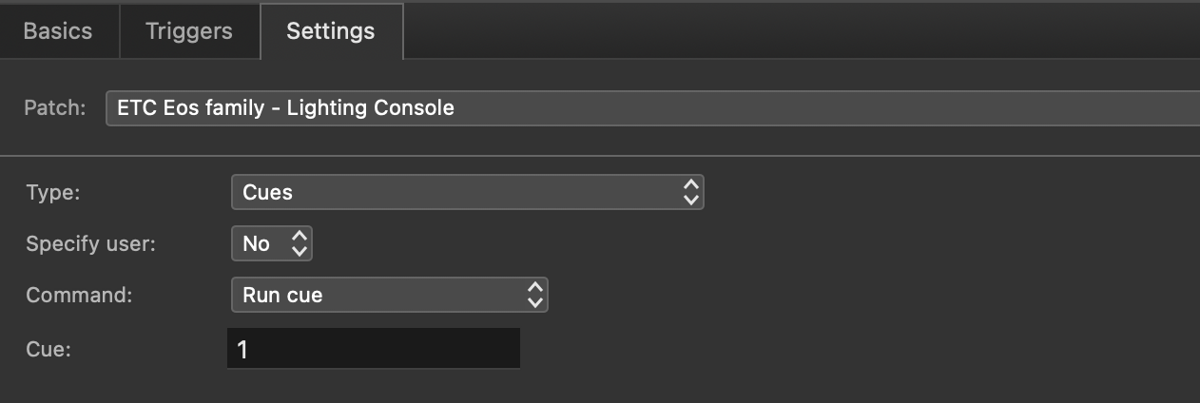
Setting it up in this way means that the console and QLab will always stay in sync rather than just simulating a press of the go button.
e.g. if you jump a few cues in QLab which included LX5, when you get to the point where LX6 is supposed to fire it will still do that rather than being in LX5.